
butterfly魔改教程(二)
魔改有风险,魔改需谨慎,一定要备份呀!!!
页面样式调节
点击查看教程
源文链接:博客魔改教程总结(二)
这个教程是通过css样式调节各个页面透明度、模糊度(亚克力效果)、圆角、边框样式等,看起来会更加舒适。
- 复制以下代码进去自定义的
custom.css文件
1 | :root { |
参数说明:
--trans-light:白天模式带透明度的背景色,如rgba(255, 255, 255, 0.88)底色是纯白色,其中0.88就透明度,在0-1之间调节,值越大越不透明;--trans-dark: 夜间模式带透明度的背景色,如rgba(25, 25, 25, 0.88)底色是柔和黑色,其中0.88就透明度,在0-1之间调节,值越大越不透明;--border-style: 边框样式,1px solid rgb(169, 169, 169)指宽度为1px的灰色实体边框;--backdrop-filter: 背景过滤器,如blur(5px) saturate(150%)表示饱和度为150%的、高斯模糊半径为5px的过滤器,这是亚克力效果的一种实现方法;大家可以根据自己喜好进行调节,不用拘泥于我的样式!
记住在主题配置文件
_config.butterfly.yml的inject配置项中引入该css文件:
1 | inject: |
- 重启项目即可看见效果:
1 | hexo cl; hexo s |
博客宽屏适配(暂时使用)
点击查看教程
宽屏适配我修改后导致了echarts统计图图表变形,图表一会儿显示正常一会不正常,没有找到解决办法,暂时使用
源文链接:博客魔改教程总结(四)
- 在
custom.css中加入以下样式:
1 | /* 全局宽度 */ |
不想再非首页的地方显示侧边栏,那就需要给非首页的页面加上标记,修改 [BlogRoot]\themes\butterfly\layout\includes\layout.pug为以下内容:
1 | - var htmlClassHideAside = theme.aside.enable && theme.aside.hide ? 'hide-aside' : '' |
或者直接用改好的pug(4.3.1可以食用)
1 | - var htmlClassHideAside = theme.aside.enable && theme.aside.hide ? 'hide-aside' : '' |
现在主页的class就变成page home了,我们再在custom.css加入如下css,主题就能智能区分主页和分页了,可以自动选择卡片显示:
1 | /* 除了首页以外其他页面隐藏卡片,并采用宽屏显示 */ |
重启项目即可看到变更:
1 | hexo cl; hexo s |
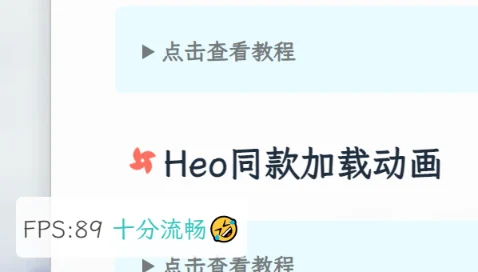
Heo同款loading动画
点击查看教程
懒得完全搬过来了,查看安知鱼-Heo同款loading动画
butterfly 4.5 以上方案
- 将文件
themes/butterfly/layout/includes/loading/fullpage-loading.pug替换为如下代码
1 | #loading-box(onclick='document.getElementById("loading-box").classList.add("loaded")') |
- 修改
themes/butterfly/layout/includes/loading/index.pug
1 | if theme.preloader.source === 1 |
- 新建
source/css/progress_bar.css, 也可以不做这一步下面配置文件pace_css_url这一项就要留空, 这一步是修改 pace 加载的胶囊 💊 样式用的
1 | .pace { |
- 替换
themes/butterfly/source/css/_layout/loading.styl为如下代码, 注意其中颜色代码--anzhiyu-card-bg等需自行替换为自己的色值。
1 | if hexo-config('preloader') |
- 在合适的地方加上自定义 css, 其中
background的url 即为 loading 的图片地址。我加在了progress_bar.css中
1 | .loading-img { |
- 最后修改
_config.butterfly.yml中preloader选项, 改完以后source: 1为满屏加载无pace胶囊,source: 2为pace胶囊无满屏动画,source: 3是两者都启用。
1 | # Loading Animation (加载动画) |
- 为了使得黑夜模式的加载动画背景为黑色,在
source/config/css/custom.css文集中加入
1 | /*--------加载动画-------------*/ |
别忘了在_config.butterfly.yml文件中的inject中引入progress_bar.css
Twikoo评论系统的实现
点击查看教程
部署方法:
直接查看此教程下面的参考文字教程和参考视频教程,比我讲的好,而且清晰明了建议看Twikoo Vercel 部署教程这个官方视频
Twikoo评论失败问题:
写在前面:
由于Vercel的域名被墙,这会导致大陆IP用户无法评论。
前提条件:
- 用
Vercel部署了Twikoo评论系统 - 一个自己的注册域名
1. 在Vercel添加子域名
进入Vercel的twikoo项目后,点击Settings - Domains,在窗口里输入一个子域名(不要加http前缀)。这里我选择用twikoo.thirdshire.com作为我的子域名。
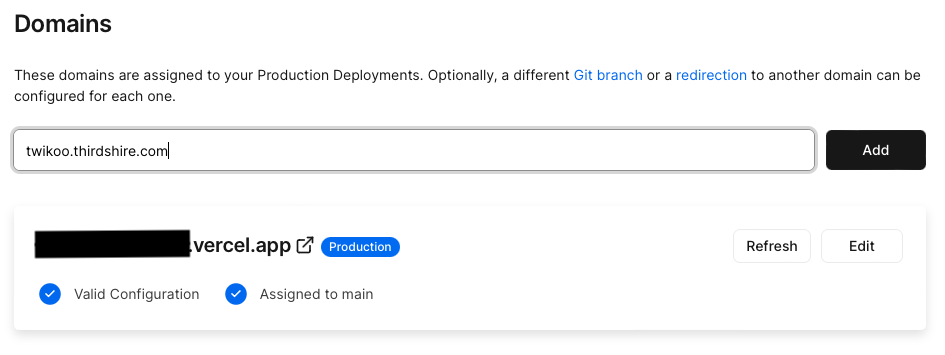
点击Add添加之后, Vercel会显示配置错误如下,并提示需要在DNS服务商处添加一条DNS记录。
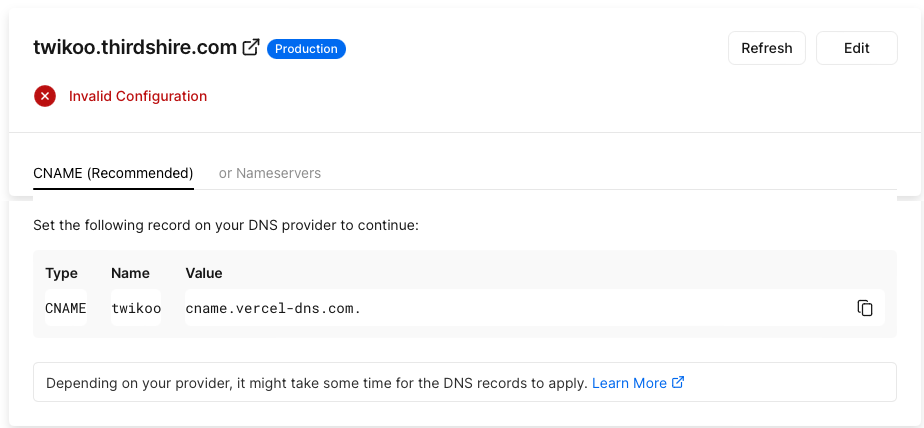
2. 为域名添加DNS记录
DNS服务商就是给网站添加各种A record/CNAME record的地方。我使用的是阿里云域名解析,找到添加DNS记录的地方,新建一条DNS 解析记录,内容就按照上面Vercel提示的添加即可。
3. 确认配置成功
添加完DNS记录之后,回到Vercel并刷新界面。看到下面这个界面,就显示DNS已经配置成功了。

想要进一步确认的话,可以点击进入这个子域名,如果网站显示“Twikoo 云函数运行正常”,就说明这个子域名可以用来当作Twikoo的入口啦。
4. 更新Twikoo设置
进入博客的配置文件,把博客文件的Twikoo设置里envID的链接替换成上面配置好的子域名。具体方法可以参考butterfly魔改教程(一)中的gitalk评论设置
这样配置完之后,国内用户也可以在Twikoo里面评论了~
Twikoo 找回暗号及密码:
打开你在部署方法阶段建立的MongoDB数据库进入页面后按照如下图步骤一次点击找到config,手动删除其中”5”指向的ADMIN_PASS 密码,重新登录 twikoo 就可以重新配置密码了


参考文章:
参考文字教程:
视频教程:
公告栏文字样式
点击查看教程
其实就是普通的html在主题配置文件_config.butterfly.yml中写入如下配置:
1 | aside: |
参考写法:
1 | aside: |
添加fps显示(LYX)
点击查看教程
- 新建文件
[BlogRoot]\source\config\js\fps.js并写入如下代码:
1 | if (window.localStorage.getItem("fpson") == undefined || window.localStorage.getItem("fpson") == "1") { |
- 在自定义样式文件
custom.css中加入如下代码,我这里让这块东西在左下角,你可以自己指定位置,其中backdrop-filter过滤器也可以自己指定,也可以不要:
1 | /* 帧率检测 */ |
- 在主题配置文件
_config.butterfly.yml文件中加入以下代码:
1 | inject: |
- 重启项目看看角落有没有出现帧率块
1 | hexo cl; hexo s |
Live2D教程(店长)
点击查看教程
目前只推荐这个(因为消耗资源较少),这是博客自带的看板娘,这孩子不会说话也不能换装,只会跟着你的鼠标晃动脑袋,不过有几款超可爱。
安装
在
Hexo根目录[BlogRoot]下打开终端,输入以下指令安装必要插件:1
npm install --save hexo-helper-live2d
打开站点配置文件
[BlogRoot]\config.yml
搜索live2d,按照如下注释内容指示进行操作。
如果没有搜到live2d的配置项,就直接把以下内容复制到最底部。1
2
3
4
5
6
7
8
9
10
11
12
13
14
15
16
17
18
19
20
21
22
23
24# Live2D
## https://github.com/EYHN/hexo-helper-live2d
live2d:
enable: true #开关插件版看板娘
scriptFrom: local # 默认
pluginRootPath: live2dw/ # 插件在站点上的根目录(相对路径)
pluginJsPath: lib/ # 脚本文件相对与插件根目录路径
pluginModelPath: assets/ # 模型文件相对与插件根目录路径
# scriptFrom: jsdelivr # jsdelivr CDN
# scriptFrom: unpkg # unpkg CDN
# scriptFrom: https://npm.elemecdn.com/live2d-widget@3.x/lib/L2Dwidget.min.js # 你的自定义 url
tagMode: false # 标签模式, 是否仅替换 live2d tag标签而非插入到所有页面中
debug: false # 调试, 是否在控制台输出日志
model:
use: live2d-widget-model-wanko # npm-module package name
# use: wanko # 博客根目录/live2d_models/ 下的目录名
# use: ./wives/wanko # 相对于博客根目录的路径
# use: https://npm.elemecdn.com/live2d-widget-model-wanko@1.0.5/assets/wanko.model.json # 你的自定义 url
display:
position: right #控制看板娘位置
width: 150 #控制看板娘大小
height: 300 #控制看板娘大小
mobile:
show: true # 手机中是否展示完成后保存修改,在Hexo根目录下运行指令。
1
2
3hexo clean
hexo g
hexo s之所以必须要使用
hexo clean是因为我们需要清空缓存重新生成静态页面,不然看板娘没被加入生成的静态页面里,是不会出现的。
更换
同样是在
Hexo根目录[BlogRoot]下,打开终端,选择想要的看板娘进行安装,例如我这里用到的是live2d-widget-model-koharu,一个Q版小正太。其他的模型也可以在模型预览里查看以供选择。输入指令
1
npm install --save live2d-widget-model-koharu
然后在站点配置文件
[BlogRoot]\_config.yml里找到model项修改为期望的模型1
2
3model:
use: live2d-widget-model-koharu
# 默认为live2d-widget-model-wanko之后按部就班的运行
1
2
3
hexo clean
hexo g
hexo s就能在
localhost:4000上查看效果了。
卸载看板娘
卸载插件和卸载模型的指令都是通过npm进行操作的。在博客根目录[BlogRoot]打开终端,输入:
1 |
|
卸载后为了保证配置项不出错,记得把[BlogRoot]\_config.yml里的配置项给注释或者删除掉。